After exploring the rainforest, students learn it rains almost every day there. Then, I share a "real" rain stick with my students. When tilted slowly, you can hear the rain trickling down from the sky. We discussed what materials could possibly be used to acquire that sound. Once this background knowledge is built, the students will be ready to create a rain stick of their own.
Materials Needed:
- paper towel tubes
- masking tape
- straight pins
- rice
- white construction paper

Preparation:
- Tape one end of the paper towel tube with masking tape
- Assign one bowl of straight pins per group (five students).
- Cut white construction paper to cover the tube.
- Trace and cut out two circles per student (to cover the ends of the paper towel tube)
- Discuss: How to slowly remove pins from the bowl so students do not prick their fingers. The teacher will model how to remove pins from the bowl and how to insert them into the tube.
Directions:
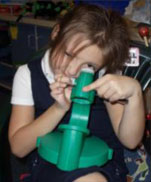
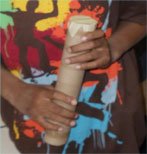
Give each student a paper towel tube. Tell them to begin inserting the straight pins. Remind students to scatter them around the tube. When there are enough pins, the teacher will place a small cup of rice in the tube. She will seal the other side of the tube with masking tape. Students will listen to the sound of their rain stick. If it does not sound like the original rain stick, they will need to add more pins. The straight pins slow the speed of the rice from dropping to the bottom so rapidly. Once the sound is imitated, give them a white piece of construction paper. The students will create a design on one side of the paper. The teacher will use Scotch tape to secure the paper onto the paper towel tube. Finally, the students will color two circles. The teacher will attach them using masking tape.
***While the students are working, put on "rainforest" music so they can feel the experience of walking through a rainforest.***
Enjoy!
Enjoy!